Layered Intent Control Architecture in Practice

In my blog post which was kind of a hey surprise! I’m alive bit .. I reflected on software control architecture that I’ve settled on and I’ve been working on. It’s half working on hardware, half still in design.

I’ve been working on three (5-sh) separate robots over the last couple years and every tine I switch to working on another I have to remember what kind of code and strategies I was using. Well, enough of that.. I now have could which is flexible enough to run on 4 different robots. Now when I work on some code, it’s for 4 robots… PHEW! That takes a lot more effort it seems and better, more flexible, structure. Anyhow back to the meat a potatoes.. I started with the end in mind.. from the bottom up through the first 3.5 layers.. and then determined it was time to switch sides or I’d overload the more semantic layers. I have done a lot of reading and spent a lot of time on YouTube watching older applied robotics videos (applied robots seems like it’s no longer hot, well it is for me).

Here is my ChatGPT-ified version of my layered system.. which is based on a couple different types of layered systems from basically ~87 or so up through the mid 2000s.

Mission Layer

  • Declares which competition (SBC3, SBC5, PopCan, RoboMagellan, etc.)
  • Supplies parameters:
    • distances
    • zones
    • object classes
    • time limits
  • Feeds the Strategy Selector

✅ Mission defines context and success, not behavior.


Strategy Selector

  • Largely determined by Mission
  • May be modulated by:
    • battery
    • confidence
    • previous failures
    • time remaining
  • Produces bias, not commands

Examples:

  • conservative vs aggressive
  • bonus-seeking vs completion-first
  • manipulation-cautious vs speed-focused

✅ Strategy shapes how hard and how risky, never what.


Rule Engine

  • Large set (30–40 is reasonable)
  • Mostly always enabled
  • Each rule:
    • observes context
    • votes or biases
    • constrains feasibility
  • Strategy biases rule weights

✅ Rules are the physics of intent — they constrain, veto, or soften options.


Goal Selection

  • Outcome of rule voting
  • Produces a single active Goal (or none)
  • Goal is:
    • high-level
    • semantic
    • competition-relevant
    • contextual

Examples:

  • REACH_LOCATION
  • DELIVER_OBJECT
  • RETURN_TO_ZONE

✅ This is the pivot point of the system.


Context Goal Layer (Goal Interpretation / Decomposition)

This is a really important layer

Responsibilities:

  • Interpret Goal semantics
  • Expand into:
    • planning intent
    • waypoint sequences
    • perception needs
    • interaction requirements
  • Decide what kind of planning is needed, not how to move

This layer answers:

“Given this goal, what must be true before I can claim success?”

✅ This is where “open fridge”, “hallway traversal”, etc. emerge — not because the goal says so, but because reality demands it.


(Optional / Transparent) Global Map Layer

  • Sometimes active, sometimes bypassed
  • Holds:
    • partial maps
    • known waypoints
    • semantic zones
  • Informs feasibility and routing

Important:
It does not own intent — it only informs it.

✅ Transparency here is a feature, not a flaw.


Local Goal Generator

  • Final distillation
  • Converts abstract intent into:
    • immediate objectives
    • local sub-goals
    • headings, distances, approach modes
  • Operates in real-time
  • Hands off to motion authority

✅ This is where deliberative intent becomes executable.


Motion Authority

  • Consumes intent
  • Obeys Sentinel and safety overrides
  • Does not question why

✅ Correctly dumb, correctly constrained.


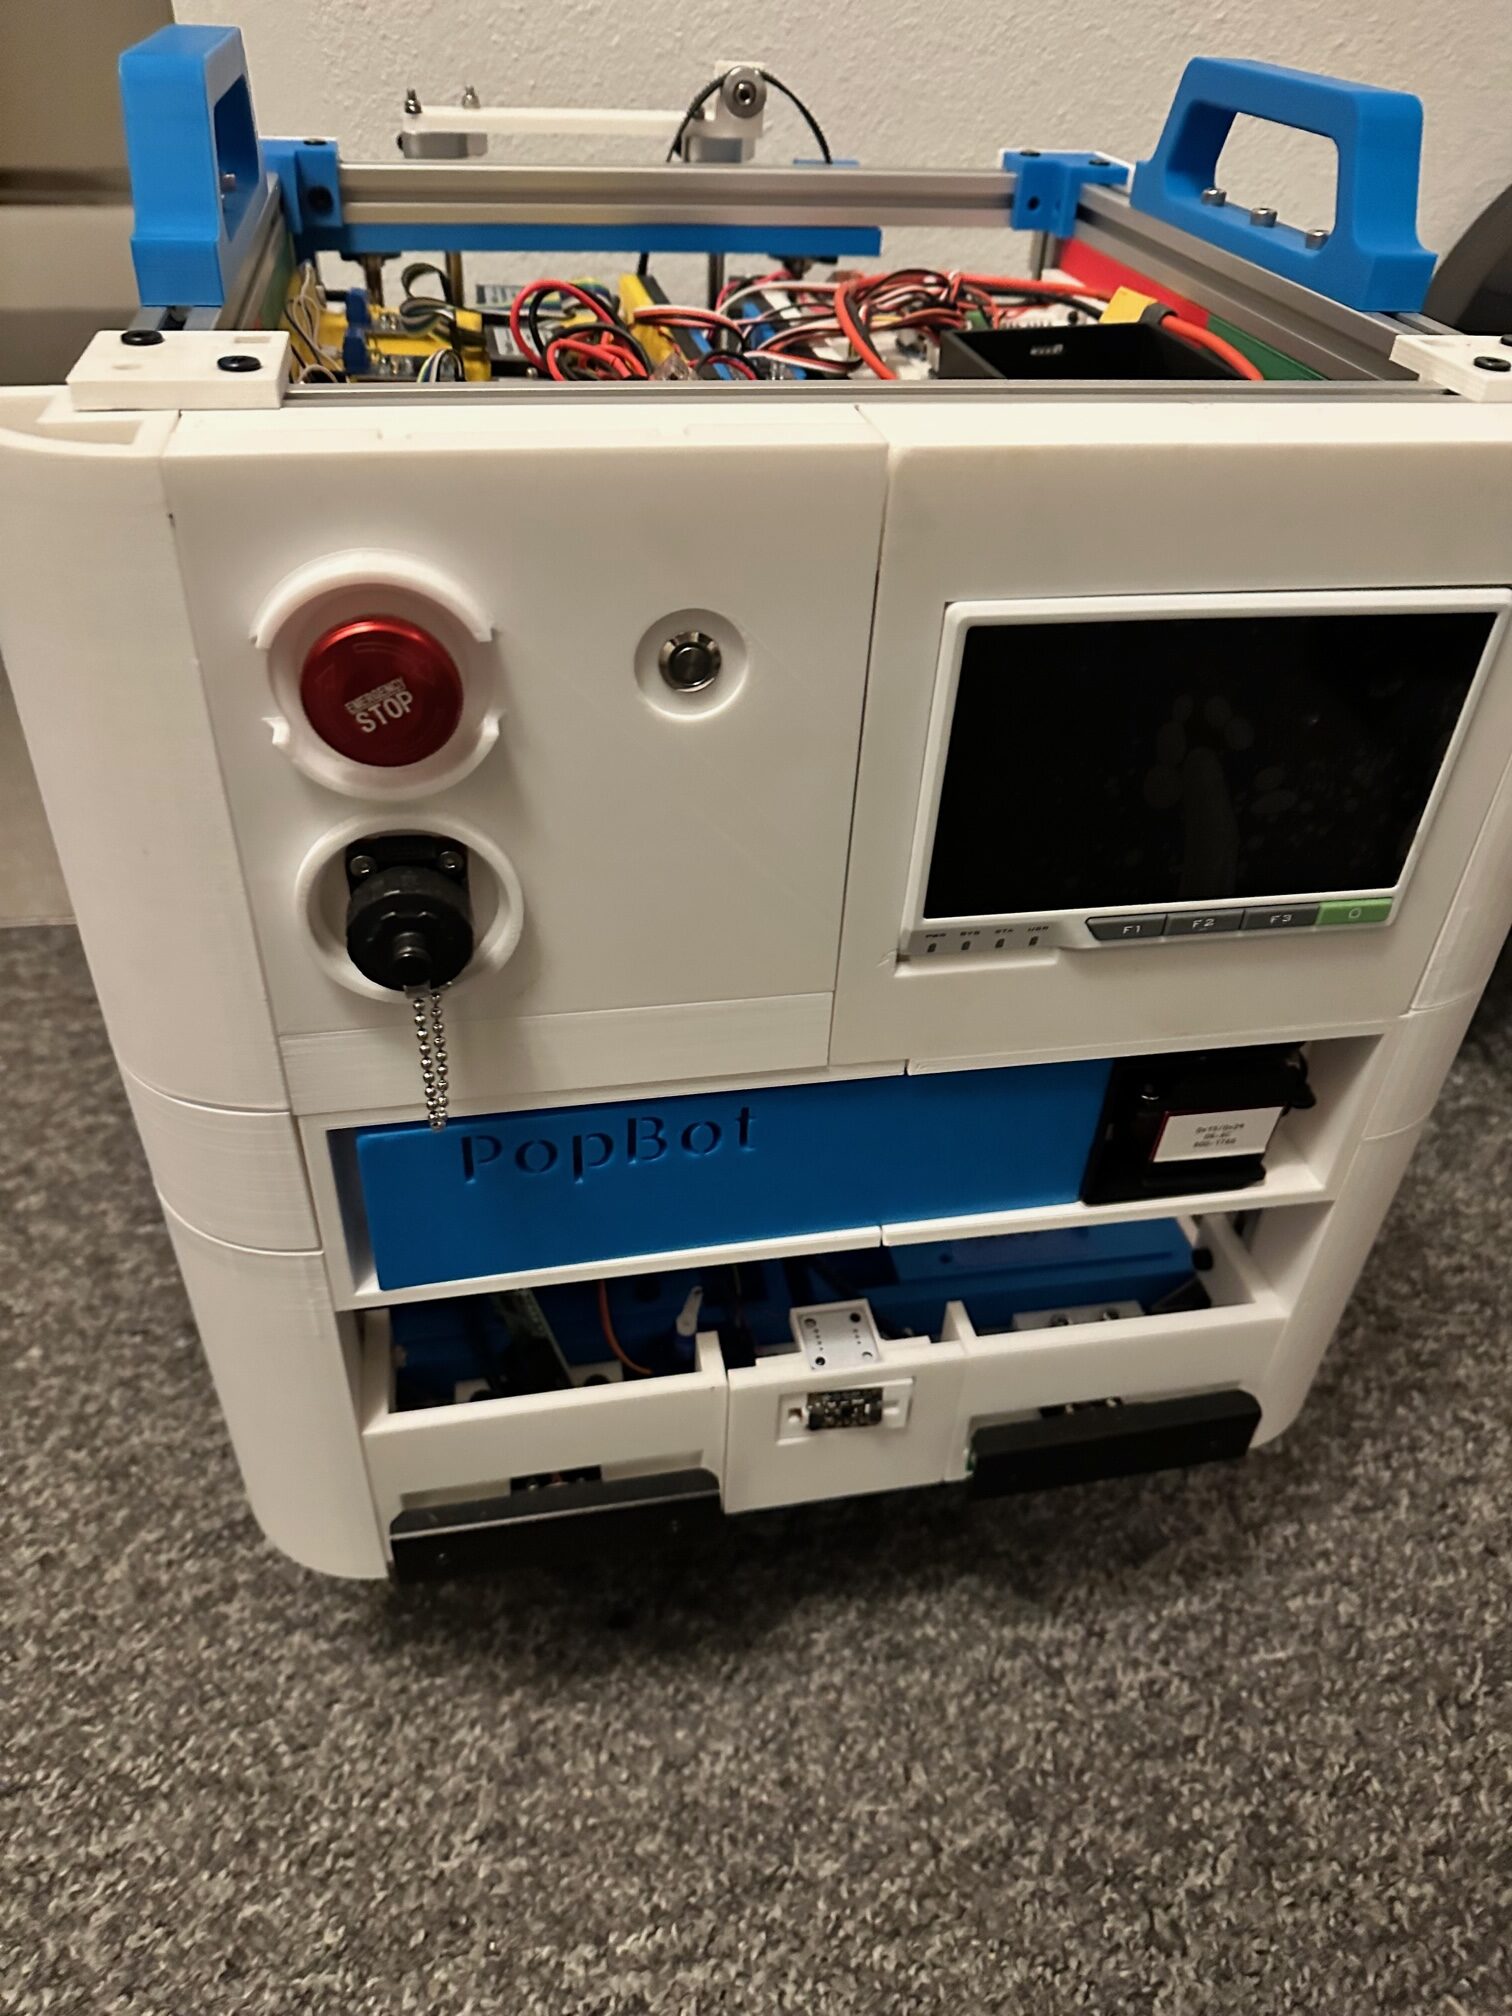
The bottom three layers are covered under the term motion authority in the above description and my sentinel layer isn’t spelled out at all; but if you’ve seen one reactive layer, you have seen them all and it was my comfort zone.

So far my favorite part has been testing the Heuristic Layer (Strategy->Voting->Goal) which I wrote as a test in NodeRED .. for fun, but I’m thinking that’s probably where it’ll live now and traverse my MQTT-> CAN Bridge. More on the juice hardware details some other time; but it’s a flexible multi-node (5-node) system on a CAN network with ODrives (CAN) and a Pi Zero W which is there mostly for logging and dashboarding now.

Layered Intent Control Architecture

LICA (Layered Intent Control Architecture) is a robotics control architecture designed to unify autonomy, safety, and human control while remaining observable, debuggable, and explainable in real time. LICA is particularly suited to mobile robots operating in uncertain environments, where layered autonomy must coexist with reactive safety systems and human override. The core principle of LICA is simple: no subsystem commands motors directly except a single authority resolver. All other subsystems express intent, not actuation. This single rule eliminates conflicting control, hidden priority inversions, and “ghost motion” caused by multiple layers fighting over outputs.

LICA is composed of independent intent-producing layers and a central arbitration point. Sensors feed into a Sentinel layer responsible for reactive safety intent, a Mission layer responsible for goal-directed autonomy, and an RC or Supervisor layer responsible for human or external control. All of these feed into a single Motion Authority Resolver, which is the only component permitted to drive the hardware backend. Each layer observes system state and publishes desired motion intent but never directly controls motors.

An intent in LICA is a structured description of desired motion rather than a command. Typical intent fields include linear velocity, angular velocity, and optional modifiers such as confidence, constraints, or urgency. Intents may be continuous, such as wall following; discrete, such as stop or one-shot actions; or reactive, such as obstacle avoidance.

The Sentinel layer exists to prevent damage or unsafe behavior. It runs continuously, is fast and reactive, does not plan, and does not know mission goals. Typical Sentinel triggers include bumper activation, time-of-flight hard stops, soft distance limits, sensor loss or staleness, and confidence collapse such as losing a wall during wall following. The Sentinel publishes both intent and explicit reason codes explaining why it intervened.

The Mission layer exists to execute structured behaviors over time. It is step-based, time-aware, and progress-aware, and may explicitly allow or disallow Sentinel override on a per-step basis. Typical mission actions include driving a distance, turning to a heading, wall following, waiting, or performing signaling actions such as buzzers. The Mission layer publishes intent along with explicit step lifecycle events including START and END, and always reports a completion or failure reason.

The RC or Supervisor layer exists to allow immediate human or external control. It has the highest priority when active, requires explicit arming, and is stateless with respect to mission execution. Typical examples include gamepads, teleoperation interfaces, or external supervisory controllers.

The Motion Authority Resolver is the keystone of LICA. There is exactly one authority resolver. It evaluates which layers are eligible to command motion, applies strict priority rules, and selects one and only one active authority. A typical priority ordering is RC when armed and fresh, then Sentinel when fresh and allowed, then Mission when active, and finally NONE when idle. Authority changes are edge-triggered and logged. Every transition is observable and includes context such as mission state and Sentinel reasoning, making behavior auditable after the fact.

LICA enforces explicit lifecycle transparency. Every mission step must emit a START event, must run for at least one control cycle, and must emit an END event with a reason. This guarantees that there are no zero-length steps, no invisible transitions, and that full post-run forensic reconstruction is possible from logs alone.

LICA exists to address common failure modes found in subsumption architectures, ad-hoc autonomy stacks, and monolithic planners. It avoids hidden suppression, implicit priority, poor fault tolerance, and non-explainable behavior. In return, LICA provides deterministic control, explicit authority, rich introspection, graceful degradation, and human-readable logs.

LICA systems obey strict design invariants: there is a single motor writer, layers express intent rather than actuation, authority changes are edge-triggered, all interventions are reasoned and logged, all lifecycles are observable, and the system fails safe to STOP. Violating any of these invariants is considered a design bug.

LICA is not a planner, not a behavior tree, and not subsumption. It is a control contract. Many layers may think, but only one may act.

Books & Articles Surrounding Ideas Related to LICA

Rodney A. Brooks (1986)

A Robust Layered Control System for a Mobile Robot

IEEE Journal of Robotics and Automation

→ Introduced subsumption and layered control in mobile robots

Rodney A. Brooks (1991)

Intelligence Without Representation

Artificial Intelligence Journal

→ Philosophical foundation for behavior-based, layered robotics

Ronald C. Arkin (1998)

Behavior-Based Robotics

MIT Press

→ Comprehensive treatment of behavior arbitration and layered robot control

Sebastian Thrun, Wolfram Burgard, Dieter Fox (2005)

Probabilistic Robotics

MIT Press

→ Covers perception, decision-making, and layered control in real robots

Hadas Kress-Gazit, Georgios Fainekos, George Pappas (2007)

Where’s Waldo? Sensor-Based Temporal Logic Motion Planning

IEEE ICRA

→ Formal methods for combining high-level intent with reactive constraints

Choset et al. (2005)

Principles of Robot Motion: Theory, Algorithms, and Implementations

MIT Press

→ Hybrid control and planning for mobile robots

M. Alami et al. (1998)

A Multi-Layer Architecture for Autonomous Robot Navigation

IEEE ICRA

→ Explicit three-layer architecture (deliberative, executive, reactive)

Ramadge & Wonham (1987)

Supervisory Control of a Class of Discrete Event Processes

SIAM Journal on Control and Optimization

→ Theoretical basis for safety supervision and override logic

Colledanchise & Ögren (2018)

Behavior Trees in Robotics and AI

CRC Press

→ Modern formalization of behavior selection and priority

Measuring Above Ground Height for Outdoor Robotics

Test 1

As I start my design of an SRS Robo-Magellan robot I have the strong desire to build off my successes and failures and of course; try something different.

On my list of “wants” is a sensor to measure distance to ground. Obviously this is normally fix unless you have suspension, and indeed I have suspension. I want to ensure my robot doesn’t bottom out while climbing hills, or if I’ve come upon a bit of a gap I don’t want my wheels to roll over.

My perception of the issue is .. grass.

Problem: I want a sensor that can give me AGL that see’s mostly into the grass. I would love if it if was non-contact but still has to be mostly water proof.

First up is one pile of junk, but good enough for the basics. An ultrasonic sensor the HC-SR04

Measured Frequency ~38KHZ

250mm accuracy  <5mm

I presented sample container to sensor. The container was about 120mm wide with grass. I found surrounding area affected readings so I hacked together a cone for the sensor. The cone corrected the reading abnormalities.

Sample weed-like grass had a rough dirt floor at 70mm above base table. The sensor is 255 millimeters above the table base.

Measurement of 10 reading rolling average was 117-122mm from table base to measured height.

Unfortunately this doesn’t really get us as far into the grass as I’d like. Worst thought is that the tallest blades rose to within 5mm from cone visibility and started causing sensor reliability issues, giving me readings greater than the length through the base. This sensor, in my opinion, is unreliable for this application.

… parts ordered for future testing but suggestions welcomed.

PopBot 0.7

SRS POPCAN CHALLENGE ROBOT

I’m now working on my eighth version of my Pop-Can Challenge Robot. As I have re-imagined my robots I continue to grow and learn better ways to accomplish things. I’ve also purposely made changes just to keep myself trying different things.

My first robot was made my comfortable choice of PIC Microcontroller(s) v0.1 was one, v0.2 was three. To laser cut design pieces, eventually adding 3D printing pieces from thing-a-verse to now using CAD to design my robot before building-on-the-fly. I’m adjusting some life priorities because I know I spread my hobbies a bit thin… and I’m not getting the time I need to finish this robot… there is a certain point where something takes more hours than you might have to offer, and I just can’t get over the ledge on software without a deeper commitment. I also hope to build a Robo-Magellan bot as well.

I will try to curate my design thoughts, considerations, and goals to break down how I built this robot and why it’s what it is… I’ve failed dozens of times, made massive painful changes, learned a ton from friends and those failures… and hope that I can provide the next person with a little inspiration; be it to improve on what I did, prove I could have done something better, or whatever the motivation. If you want any part of the design down to the code of my work let me know… I’m terrible about documenting, but I am hopeful to change that going forward. My goals going forward are to better document what I am working on so that you can easily copy and speed up the time for developing your own project. I also encourage you to share your project(s), including failures to help the wider community.

My robot builder’s database page with a few more photos: The Builders Database (buildersdb.com)

NES 8bit Controller with Arduino

Perhaps this will help someone out there?

I purchased a 2-pack of rip off NES 8bit controllers on Amazon with an “extension” cord so that I had a ready made connector. Cut the extension cord off and wired it to an Arduino Mega (because that’s what was on the bench). I am using this for a game I am working on for the Makerspace… but through maybe you could use a snippet that worked. The first google code I tried to copy and paste didn’t work so hot.. so here is what I came up… I did find some inspiration here and there but this is a good launching point for your next project.

/*

NES Controller

*/

const int latch = 50;
const int clock = 48;
const int data  = 49;

#define latchlow digitalWrite(latch, LOW)
#define latchhigh digitalWrite(latch, HIGH)
#define clocklow digitalWrite(clock, LOW)
#define clockhigh digitalWrite(clock, HIGH)
#define dataread digitalRead(data)
#define wait delayMicroseconds(15)

unsigned long previousMillis = 0;
const int wait_interval = 20; 

const int A_BUTTON         = 0;
const int B_BUTTON         = 1;
const int SELECT_BUTTON    = 2;
const int START_BUTTON     = 3;
const int UP_BUTTON        = 4;
const int DOWN_BUTTON      = 5;
const int LEFT_BUTTON      = 6;
const int RIGHT_BUTTON     = 7;

byte output;

void setup() {
	Serial.begin(115200);
	pinMode(latch, OUTPUT);
  pinMode(clock, OUTPUT);
  pinMode(data, INPUT);
  Serial.println("NES TEST");

}

boolean isBitSet (byte myVar, byte bitNumber) {
  bool bitvalue;
  bitvalue = myVar & (1 << bitNumber);
  return bitvalue;
}  


void readNES() {
  latchlow;
  clocklow;
  latchhigh;
  wait;
  latchlow;
 
  for (int i = 0; i < 8; i++) {
     output += dataread * (1 << i);
     clockhigh;
     wait;
     clocklow;
     wait;
  }
}

void hexprint(byte b) {

  Serial.print("0x");
  if (b < 10) Serial.print("0");
  Serial.println(b, HEX);

}

void loop() {
  output = 0;
  readNES();
  if (!isBitSet(output, 0)) Serial.println("A Button");
  if (!isBitSet(output, 1)) Serial.println("B Button");
  if (!isBitSet(output, 2)) Serial.println("SELECT Button");
  if (!isBitSet(output, 3)) Serial.println("START Button");
  if (!isBitSet(output, 4)) Serial.println("UP Button");
  if (!isBitSet(output, 5)) Serial.println("DOWN Button");
  if (!isBitSet(output, 6)) Serial.println("LEFT Button");
  if (!isBitSet(output, 7)) Serial.println("RIGHT Button");
  //Serial.print("Read: "); hexprint(output);
}

Combining serial stream bytes/nibbles to make a number.

I thought I’d drop this here for someone who needed a copy-paste solution.

I am parsing a serial string output from a YDLIDAR X4 rotating lidar. I have to do this because the library sucks. a lot. I mean I’m not over my heels with the unit anyhow, first off who the hell outputs at 128,000 baud? I’ll post the code when it’s done enough for someone to build off of it.

I was getting an error in number of bytes in the packet as parsed from the serial string so I had to break out the function into really busy but obvious code to see where I was going wrong. The code has me concatenating two bytes and an upper nibble. Ignore the discrepancy in how I added my bytes backwards in my code vs. how the device actually stacks it’s data… because you know: WHO IN THEIR RIGHT MIND SHIFTS LSB ON THE LEFT?! (note the “length bytes as shown in 12 bits and the “response length” example below.)

Anyhow… feel free to show me how to do it better in the comments. Obviously this is built for you to look at it do it’s magic in a serial monitor.

//Arduino Friendly.
unsigned long rx_make_length(byte b1, byte b2, byte b3) {
  unsigned int msb_bits = 0; 
  unsigned long length_value = 0;
  
  //drop the lower nibble and prep for OR-ing.
  b3 = b3 >> 4;

  Serial.print("c w/ nibble removed and right shift: "); Serial.println(b3, HEX);

  msb_bits = b1;   
  msb_bits = msb_bits << 8;
  Serial.print("b1 shifted up 8 : "); Serial.println(msb_bits, HEX);
  msb_bits = msb_bits | b2;
  Serial.print("b1 concatenated w/ b2: "); Serial.println(msb_bits, HEX);
  length_value = msb_bits;
  length_value = length_value << 4; 
  Serial.print("b1 concatenated w/ b2 w/ shift: "); Serial.println(length_value, HEX);
  length_value = length_value | b3;
  Serial.print("b1 concatenated b2 and b3: "); Serial.println(length_value, HEX);

  return length_value;
}

//unsigned long my_value = rx_make_lenth(a, b, c);

iButtonLink / DS18B20 Arduino Datalogger

What a groaner.. who needs another datalogger? Well I do, so stuff it. I was inspired to check out these iButtonLink devices that allow you to daisy-chain connect a number of devices in a single circuit of sorts with RJ45 patch cables. I had seen these a couple years ago in some top-notch datacenters that terminated to a concentrator (4 strings) that were then pushed up to some IBM services app server.

A while back I published a Microsoft PIC microcontroller version of this … I decided to give it another whirl with the “easy button” … Arduino. Of course there were a couple libraries that I just had to collectively stuff into the same sketch and easy-peasy it was done in an hour or so.

This time I have my data stored to an SD card, which … I hastily put together.

If I was actually going to finish this I would add three things to this to finish it up.

  1. Use an RTC, figure an interface to enter the correct time. (maybe add an ethernet shield and get NTP?) … or just manual enter.
  2. I’d grab the interval time off the RTC and just have the loop do a non-blocking wait, then poll the RTC time or interrupt (whatever you favorite way to do this is..) that way I was collecting trend information on the “:00″s.
  3. I would add a method of checking for an SD card to be interested and allow it to start logging from card insert. I would also add time/date stamp to the file and finally, still SD card related I would check file size and stop logging when I got close to full.

So that is that. I’ve been creating a lot of fun lately but nothing mind-bending.. just going through every module I’ve ever bought doing the demo code … or going the other way around.. working on every Arduino demo/example in a class .. I’ve also built an FE boat, moved my workshop inside (update video coming kind of soon) and been working on PopBot 0.5 ..

The code:

/*
 * Chas Ihler
 * @chasxmd
 * https://iradan.com/
 * 
 * License: Public Domain - it's mostly copy and paste and preferences anyways.
 * 
 * iButtonLink, grabs all sensors and logs them to card if present.
 * Recommendations: 
 * Add an RTC and a method of updating time. 
 * I'd also grab actual seconds off the RTC for logging and use a non-blocking wait for the polling/logging. 
 * 
 * Libraries:
 * https://github.com/matmunk/DS18B20
 * IDE built in SD card/SPI library
 * 
 * Sensor: 
 * https://www.ibuttonlink.com/products/t-sense-temperature-sensor
 * which has this device within.. 
 * https://datasheets.maximintegrated.com/en/ds/DS18B20.pdf
 * 
 * Hookup:
 * You'll need a pullup resistor from 5V to pin 2
 * ibutton hookup:
 * 1 - GND
 * 2 - 5VDC
 * 3 - NC
 * 4 - Arduino Pin 2 (w/ Pullup)
 * 5 - GND
 * 6 - NC
 * 7 - NC
 * 8 - NC
 * 
 *  SD card attached to SPI bus as follows:
 * MOSI - pin 11
 * MISO - pin 12
 * CLK - pin 13
 * CS - pin 4 
 * 
 */

#include <DS18B20.h>
#include <SPI.h>
#include <SD.h>


DS18B20 ds(2);    //pin 2

const int chipSelect = 4;

void setup() {
  Serial.begin(115200);
  delay(100);

  Serial.println("----------------------------------------");
  Serial.println(" ");
  Serial.println("DS18B20 / iButtonLink Demo");
  Serial.print("Devices: ");
  Serial.println(ds.getNumberOfDevices());
  Serial.println(" ");
  Serial.println("----------------------------------------");
   Serial.print("Initializing SD card...");

  // see if the card is present and can be initialized:
  if (!SD.begin(chipSelect)) {
    Serial.println("Card failed, or not present");
    // don't do anything more:
    while (1);
  }
  Serial.println("card initialized.");
}

void loop() {
  int i_address;
  Serial.println("----------------------------------------");
  while (ds.selectNext()) {
    String str_dataString = "";
    switch (ds.getFamilyCode()) {
      case MODEL_DS18S20:
        Serial.println("Model: DS18S20/DS1820");
        break;
      case MODEL_DS1822:
        Serial.println("Model: DS1822");
        break;
      case MODEL_DS18B20:
        Serial.println("Model: DS18B20");
        break;
      default:
        Serial.println("Unrecognized Device");
        break;
    }

    uint8_t address[8];
    ds.getAddress(address);
    
    Serial.print("Address:");
    for (uint8_t i = 0; i < 8; i++) {
      Serial.print(" ");
      Serial.print(address[i]);
      str_dataString += String(address[i]);
    }
    Serial.println();
/*
    Serial.print("Resolution: ");
    Serial.println(ds.getResolution());

    Serial.print("Power Mode: ");
    if (ds.getPowerMode()) {
      Serial.println("External");
    } else {
      Serial.println("Parasite");
    }
*/
    Serial.print("Temperature: ");
    Serial.print(ds.getTempC());
    Serial.print(" C / ");
    Serial.print(ds.getTempF());
    Serial.println(" F");
    
    str_dataString += ",";
    str_dataString += String(ds.getTempC()); 
    File dataFile = SD.open("datalog.txt", FILE_WRITE);
    
    if (dataFile) {
        dataFile.println(str_dataString);
        dataFile.close();
        Serial.println(str_dataString);
    }  else {
        Serial.println("error opening datalog.txt");
    }
    Serial.println("        *****       ");
    Serial.println(); 
  }

  delay(30000);
}

Happy Making!

Re-Post: iButtonLink T-Sense 1-wire sensor (Maxim DS18B20) + PIC 18F14K22

Using a PIC Microcontroller to pull temperature of iButtonLink T-sense sensor.

I pulled this off the wayback machine because I lost this post in the great database loss of how ever many years ago. I’m re-posting because I’m working on an expanded version of this with an Arduino dev board and wanted a reminder of what I did five years ago. Originally posted 1/2/2015. No edits.

—————————————————————————————————————-

I came across a stash of iButton T-sense 1-wire sensors.. so I grabbed a couple and decided to check out 1-wire.

Maxim makes a 1-wire device called the DS18B20. It’s a 9-12 bit temperature sensor with the possibility of being powered by parasitic power from the data line. This cuts the signal path down to a single DQ line and a return. A company called iButtonLink produces a nice little wrapper around this device called a T-Sense. There are a couple pieces of software out there that will allow you to hook these up to monitoring systems, I don’t have any though. These devices come with a 64-bit address code and can be daisy-chained which makes having many of these devices monitored very nice.

At first I thought, ugh.. lame I have to send, and parse 64-bit codes in a little 8 bit micro.. doesn’t sound like a ton of fun for just fooling around on a day off.. thank fully they have a “Skip ROM” feature/command which works similar to a broadcast but can only be used when you have one device on the bus. If there is one thing left in this project I might consider finishing it’d be to add the addressing in and daisy-chain a few of these.

Most of my research came from Microchip’s Application Note AN1199 though the T-Sense Users Manual also helped out including determining the wiring diagram.

For my circuit I hooked up 5VDC (but later ran it on 3.3V just fine) and the 5VDC return on pins 1 & 2. Then the DQ link and return on pins 4&5. The signaling is interesting as the 1-wire bus needs a weak pull and works with an open collector circuits. The master starts all signaling, writes and reads. The 1’s and 0’s are based on how long the master or slave sinks the DQ line. To accomplish this in the PIC microcontroller I switched the port from an output to a three state input when I needed the port to be in weak-pull up mode (which is also hand when I need to sample the port for a response from a slave). The pull up on the resistor in my circuit is 10Kohm but I’ve seen 4.7KOhm and I’m sure anywhere in the neighborhood is fine. Finally if you do some digging you’ll notice I run this in low speed mode, if I remember correctly the “high speed” mode is 4x faster. I don’t think speed of data transfer is really relevant when you’re waiting for 750ms for a temperature conversation though.

I initially started with just determining if there was a 1-wire device on the bus. If you perform a “reset” (master sinks the bus low for 480us then releases to hi-z for 70us and then performed a sample.. any (all) device(s) will sink the line slow to prove their presence…then another 410us of delay before continuing. I got this one first try.. better luck than my first time with I2C! I then wrote the code (including sampling tidbits of Microchip AN1199 code to optimize) to do an actual temperature conversion and request it (by commanding a “read scratch pad”). The device dumps all 9 bytes of it’s registers. On that note I just remembered I should mention I did NOTHING with the CRC byte.. that’s all you if you care.

My temperature conversion code looks like this: (bus control m = master or PIC, s=slave or sensor)

m RESET

s PRESENCE flag

m SKIP ROM (0xCC)

m CONV TEMP (0x44)

m HOLD DQ (Hold line high 750ms for 12bit conversion .. I am guessing we hold it high for the parasitic power supply)

m RESET

s PRESENCE flag

m SKIP ROM (0xCC)

m READ SCRATCHPAD (0xBE)

s 9 Bytes of Data

The 12-bit conversion is basically 0.0625 deg C for every bit from 0C, The LSB holds a temperature sign.

The output of my program looks like..

Final Results!

There are tons of details on what a “1” is an what a “0” is, the ROM code (READ ROM, MATCH ROM), changing the configuration to 9bit for 94 ms conversions over 12bit 750ms conversions. This is all stuff you can grab out of the DS18B20 specification sheet or AN1199.

I hope you get some use out of this.. I still have enough of these T-Sense modules.. maybe if someone really wants one I’ll drop it in the mail… or perhaps we can set up a big box of electronics to ship around and I can dump some in there.

Items I used to make this happen:

TAUTIC 20-pin Development Board

Microchip PIC 18F14K22

AST Breadboard Buddy Pro

AST tinyLEDx4

iButtonLink T-Sense

CAT5 breakout board (eBay?)

Microchip PICKit 3

Then miscellaneous tools, test equipment, jumpers and a breadboard.

The good stuff (my code):

.. also found here on pastebin: http://pastebin.com/HrLg1GqL

/*
 * File:   main.c
 * Author: Charles M Douvier
 * Contact at: http://iradan.com
 *
 * Created on Janurary 1, 2015
 *
 * Target Device:
 * 18F14K22 on Tautic 20 pin dev board
 *
 * Project: Maxim 1-Wire Testing
 *
 * Details of 1-wire protocol using Microchip AN1199
 * Field device http://datasheets.maximintegrated.com/en/ds/DS18B20.pdf
 * The 1-Wire Protocol is registered trade mark of Dallas/Maxim semiconductor.
 *
 * Some code was use by the AN1199 App Note Source code; I got stuck looking for a fast way of txing by bit-bang (yes never did this before)
 * The agreement below mentions a license agreement accompaning this software; There was none. I'll note where this software was used if you
 * want to re-write without the Microchip bits.
 * The Microchip licensing as follows:
 *
 *  * FileName:        1wire.c
 * Dependencies:
 * Processor:       PIC18
 * Complier:        MCC18 v3.13
 * Company:         Microchip Technology, Inc.
 *
 * Software License Agreement
 *
 * Copyright © 2004-2007 Microchip Technology Inc.  All rights reserved.
 *
 * Microchip licenses to you the right to use, copy and distribute Software
 * only when embedded on a Microchip microcontroller or digital signal
 * controller and used with a Microchip radio frequency transceiver, which
 * are integrated into your product or third party product (pursuant to the
 * sublicense terms in the accompanying license agreement).  You may NOT
 * modify or create derivative works of the Software.
 *
 *
 * You should refer to the license agreement accompanying this Software for
 * additional information regarding your rights and obligations.
 *
 * SOFTWARE AND DOCUMENTATION ARE PROVIDED “AS IS” WITHOUT WARRANTY OF ANY
 * KIND, EITHER EXPRESS OR IMPLIED, INCLUDING WITHOUT LIMITATION, ANY WARRANTY
 * OF MERCHANTABILITY, TITLE, NON-INFRINGEMENT AND FITNESS FOR A PARTICULAR
 * PURPOSE. IN NO EVENT SHALL MICROCHIP OR ITS LICENSORS BE LIABLE OR OBLIGATED
 * UNDER CONTRACT, NEGLIGENCE, STRICT LIABILITY, CONTRIBUTION, BREACH OF
 * WARRANTY, OR OTHER LEGAL EQUITABLE THEORY ANY DIRECT OR INDIRECT DAMAGES OR
 * EXPENSES INCLUDING BUT NOT LIMITED TO ANY INCIDENTAL, SPECIAL, INDIRECT,
 * PUNITIVE OR CONSEQUENTIAL DAMAGES, LOST PROFITS OR LOST DATA, COST OF
 * PROCUREMENT OF SUBSTITUTE GOODS, TECHNOLOGY, SERVICES, OR ANY CLAIMS BY
 * THIRD PARTIES (INCLUDING BUT NOT LIMITED TO ANY DEFENSE THEREOF), OR OTHER
 * SIMILAR COSTS.
 *
 *
 *
 * Version:
 * 0.1  Configuration, with reset test
 * 0.2
 *
 */
#ifndef _XTAL_FREQ
#define _XTAL_FREQ 16000000 //4Mhz FRC internal osc
#define __delay_us(x) _delay((unsigned long)((x)*(_XTAL_FREQ/4000000.0)))
#define __delay_ms(x) _delay((unsigned long)((x)*(_XTAL_FREQ/4000.0)))
#endif
#include 
#include 
#include 
#include 
//config bits
#pragma config FOSC=IRC, WDTEN=OFF, PWRTEN=OFF, MCLRE=ON, CP0=OFF, CP1=OFF, BOREN=ON
#pragma config STVREN=ON, LVP=OFF, HFOFST=OFF, IESO=OFF, FCMEN=OFF
#define _XTAL_FREQ 16000000 //defined for delay
/*
 * Variables
 */
    int     device_present;             // 1 = 1-wire device on 1-wire bus
    int     i, x, y, int_temp, an4_value;               //
    long int    decm;
    int     itxdata, txdata;            //int RS232 tx data
    char    rxbuff[10], z[1], buf[4];                 //buffer for T-sense 1-wire device
    float    temperature, f, d;
    volatile unsigned int uart_data;    // use 'volatile' qualifer as this is changed in ISR
/*
 *  Functions
 */
    void interrupt ISR() {
    if (PIR1bits.RCIF)          // see if interrupt caused by incoming data .. unused currently
    {
        uart_data = RCREG;     // read the incoming data
        PIR1bits.RCIF = 0;      // clear interrupt flag
                                //
    }
    // I left this timer interrupt if I needed it later. This is unused.
    if (PIR1bits.TMR1IF)
    {
        //T1CONbits.TMR1ON = 0;
        PIR1bits.TMR1IF = 0;
        //T1CONbits.TMR1ON = 1;
    }
}
     void __delay_10ms(unsigned char n)     //__delay functions built-in can't be used for much at this speed... so!
 {
     while (n-- != 0) {
         __delay_ms(10);
     }
 }
void uart_send (unsigned int mydata_byte) {      //bytes
    while(!TXSTAbits.TRMT);    // make sure buffer full bit is high before transmitting
    TXREG = mydata_byte;       // transmit data
}
void write_uart(const char *txt)                //strings
{
                                //this send a string to the TX buffer
                                //one character at a time
       while(*txt)
       uart_send(*txt++);
}
//This code if from Microchip but is unused currently.
void uart_send_hex_ascii(unsigned char display_data)
{
	//unsigned char temp;
	//temp = ((display_data & 0xF0)>>4);
	//if (temp <= 0x09)
	//	Putchar(temp+'0');
	//else
	//	Putchar(temp+'0'+0x07);
        //
	//temp = display_data & 0x0F;
	//if (temp <= 0x09)
	//	Putchar(temp+'0');
	//else
	//	Putchar(temp+'0'+0x07);
	//Putchar('\r');
	//Putchar('\n');
}
void serial_init(void)
{
    // calculate values of SPBRGL and SPBRGH based on the desired baud rate
    //
    // For 8 bit Async mode with BRGH=0: Desired Baud rate = Fosc/64([SPBRGH:SPBRGL]+1)
    // For 8 bit Async mode with BRGH=1: Desired Baud rate = Fosc/16([SPBRGH:SPBRGL]+1)
    TXSTAbits.BRGH=1;       // select low speed Baud Rate (see baud rate calcs below)
    TXSTAbits.TX9=0;        // select 8 data bits
    TXSTAbits.TXEN=1;     // enable transmit
    BAUDCONbits.BRG16=0;
    RCSTAbits.SPEN=1;       // serial port is enabled
    RCSTAbits.RX9=0;        // select 8 data bits
    RCSTAbits.CREN=1;       // receive enabled
    SPBRG=25;               //38,400bps-ish
                            //BRG16=0, 7=31.25k, 25=9.615k
    PIR1bits.RCIF=0;        // make sure receive interrupt flag is clear
    PIE1bits.RCIE=1;        // enable UART Receive interrupt
         __delay_ms(10);        // give time for voltage levels on board to settle
}
void init_io(void) {
    ANSEL = 0x00;         
    ANSELH = 0x00;
    TRISAbits.TRISA0 = 0; // output
    TRISAbits.TRISA1 = 0; // output
    TRISAbits.TRISA2 = 0; // output
    TRISAbits.TRISA4 = 0; // output
    TRISAbits.TRISA5 = 0; // output
    TRISBbits.TRISB4 = 0; // output
    TRISBbits.TRISB5 = 1; // input (RX UART)
    TRISBbits.TRISB6 = 0; // output
    TRISBbits.TRISB7 = 0; // output (TX UART)
    LATC = 0x00;
    TRISCbits.TRISC0 = 1; // AN4
    TRISCbits.TRISC1 = 1; // 1-wire data
    TRISCbits.TRISC2 = 0; // 
    TRISCbits.TRISC3 = 0; // 
    TRISCbits.TRISC4 = 0; // 
    TRISCbits.TRISC5 = 0; // output
    TRISCbits.TRISC6 = 1; // input
    TRISCbits.TRISC7 = 1; // input
}
void init_adc (void)
{
    ANSELbits.ANSEL4=1;         //PORTC.0
    ADCON2bits.ADCS = 0x02;     //Fosc/32
    ADCON2bits.ADFM=0;          //left oriented
    ADCON1=0x00;
}
void read_adc (void)
{
    ADCON0bits.CHS0 = 0;        // AD4
    ADCON0bits.CHS1 = 0;
    ADCON0bits.CHS2 = 1;
    ADCON0bits.CHS3 = 0;
    ADCON0bits.ADON = 1;        // A/D ON
    __delay_us(5);
    ADCON0bits.GO   = 1;        // ..GO!
    __delay_us(5);
        while (ADCON0bits.GO) continue;              //wait for conversion
        an4_value = ADRESH;                          //AN4 value
}
void one_wire_reset(void) {
    device_present = 0x00;
    TRISCbits.TRISC1 = 0;
    LATCbits.LATC1 = 0;
    __delay_us(240);        //delay 480 us
    __delay_us(240);
    TRISCbits.TRISC1 = 1;
    __delay_us(70);
    if (!PORTCbits.RC1) {
            device_present = 0x01;
    }
    __delay_us(205);        //delay 410 us
    __delay_us(205);
}
//this looks a lot like the Microchip code, it was not I just happened to be on the right track.
void one_wire_tx_bit(unsigned char txbit) {         // write a bit
    if (txbit) {
    TRISCbits.TRISC1 = 0;
    LATCbits.LATC1 = 0;
    __delay_us(6);    
    TRISCbits.TRISC1 = 1;
    __delay_us(64);      
    }
    else {      
    TRISCbits.TRISC1 = 0;
    LATCbits.LATC1 = 0;
    __delay_us(60);    
    TRISCbits.TRISC1 = 1;
    __delay_us(10);    
    }
}
//from Microchip AN1199 code, renamed and slightly modified to match my software
/**********************************************************************
* Function:        void OW_write_byte (unsigned char write_data)
* PreCondition:    None
* Input:		   Send byte to 1-wire slave device
* Output:		   None
* Overview:		   This function used to transmit a complete byte to slave device.
*				   
***********************************************************************/
void one_wire_tx_byte (unsigned char write_data)
{
	unsigned char loop;
	
	for (loop = 0; loop < 8; loop++) 	{ 		one_wire_tx_bit(write_data & 0x01); 	//Sending LS-bit first 		write_data >>= 1;					// shift the data byte for the next bit to send
	}	
}	
//from Microchip AN1199 code: I gathered the essence of this but seeing as I am not using most of the AN1199 code
//and this would not work with XC8 I had to re-write this.
/**********************************************************************
* Function:        unsigned char OW_read_bit (void)
* PreCondition:    None
* Input:		   None
* Output:		   Return the status of the OW PIN
* Overview:		   This function used to read a single bit from the slave device.
*				   
***********************************************************************/
unsigned char one_wire_rx_bit (void)
{
	unsigned char read_data; 
        read_data = 0x00;
	//reading a bit 
	TRISCbits.TRISC1 = 0;
        LATCbits.LATC1 = 0; 						// Drive the bus low
	__delay_us(6);						// delay 6 microsecond (us)
	TRISCbits.TRISC1 = 1;  						// Release the bus
	__delay_us(9);						// delay 9 microsecond (us)
        if (PORTCbits.RC1) {                                    //read 1 or 0
            read_data = 0x01;
        }
	__delay_us(55);						// delay 55 microsecond (us)	
	return read_data;
}
/**********************************************************************
* Function:        unsigned char OW_read_byte (void)
* PreCondition:    None
* Input:		   None
* Output:		   Return the read byte from slave device
* Overview:		   This function used to read a complete byte from the slave device.
*				   
***********************************************************************/
unsigned char one_wire_rx_byte (void)
{
	unsigned char loop, result=0;
	
	for (loop = 0; loop < 8; loop++)                // here we are reading 8 bits (1 byte) 	{ 		 		result >>= 1; 				// shift the result to get it ready for the next bit to receive
		if (one_wire_rx_bit())
		result |= 0x80;				// if result is one, then set MS-bit
	}
	return result;					
}	
void one_wire_conversion_pulse(void) {
    	TRISCbits.TRISC1 = 0;
        LATCbits.LATC1 = 1; 		 //For T conv we drive the DQ line high for 750ms (12bit)
	__delay_us(250);                 // delay 
	__delay_us(250);                  
        __delay_us(250);                  
	TRISCbits.TRISC1 = 1; 
        LATCbits.LATC1 = 0;             //just in case this causes problems elsewhere                              
}
int main(void) {
    init_io();
    // set up oscillator control register, using internal OSC at 16MHz.
    OSCCONbits.IRCF = 0x07; //set OSCCON IRCF bits to select OSC frequency 16MHz
    OSCCONbits.SCS = 0x02; //set the SCS bits to select internal oscillator block
    //RCONbits.IPEN = 0;          //dsiable priority levels
    INTCONbits.PEIE = 1;        // Enable peripheral interrupt
    INTCONbits.GIE = 1;         // enable global interrupt
    init_adc();                 //unused but AN4 is there if I need it
    serial_init();
    uart_send ('x');
        LATAbits.LATA0 = 0; //this is just for debugging with an LA..
        __delay_us(1);
        LATAbits.LATA0 = 1; //also confirms oscillator setup is correct.. 1us width
        __delay_us(1);
        LATAbits.LATA0 = 0;
    while (1) {
        one_wire_reset();
        if (device_present) {
            LATCbits.LATC2 = 1;             //this is a 1-wire device out there for debugging
            one_wire_tx_byte(0xCC);         //skip-rom (similar to a broadcast)
            one_wire_tx_byte(0x44);         //do a temp conversion
            one_wire_conversion_pulse();    // hold DQ line high for 750ms
            one_wire_reset();
            //add additional check here later
            one_wire_tx_byte(0xCC);         //skip-rom (similar to a broadcast)
            one_wire_tx_byte(0xBE);         //read scratch pad
            for(i = 0; i<9; i++)            //reading all 9 bytes on the T-Sense
   		rxbuff[i] = one_wire_rx_byte();
            // T-Sense
            //  Byte 0 LSB of Temp
            //  Byte 1 MSB of Temp and sign
            // LSB
            //  2^3 2^2 2^1 2^0 2^-1 2^-2 2^-3 s^-4
            // MSB
            // S S S S S 2^6 2^5 2 ^ 4
            temperature = 0;
            f = 0.0625;
            //z[0] = rxbuff[1];
            //x = atoi(z);
            x = rxbuff[1];
            if (x & 0b10000000) {
                uart_send('-');
            } else {
                uart_send('+');
            }
            
            x = x & 0b00000111;
            int_temp = 0;
            int_temp = rxbuff[0];
            if (x & 0b00000001)
                int_temp = int_temp + 0x100;
            if (x & 0b00000010)
                int_temp = int_temp + 0x200;
            if (x & 0b00000100)
                int_temp = int_temp + 0x400;
            temperature = int_temp * f;
            
            int_temp = temperature;
            itoa(z, int_temp, 10);
            write_uart(z);
            uart_send('.');
            d = temperature - int_temp;
            decm = d * 1000;
            //page 374 of XC8 user guide
            ltoa(buf,decm,10);  //long conversion to buffer
            y=strlen(buf);  //uh, adding leading zeros..
            y=3-y;      //probably a better way of doing thing
            while (y)       //first figure out how many zeros
            {
                uart_send('0');  //missed 3-string length
                y=y-1;  //then send them until done
            }   
            write_uart (buf);
        
            uart_send(0x0A);        //LF
            uart_send(0x0D);        //CR
            //temperature   float temperature
            //int_temp      interger value of temperature
            __delay_10ms(254);
        }
    }
    return (EXIT_SUCCESS);
}

eBay Mini-vacuum Pump

Quick version: Hey this little thing works and seems practical for robotics, specifically the Pop Can Challenge.

I had to add “mini” to the title of this post, calling this a vacuum pump seems odd when you’ve played around with big pumps. Which leads me to make a mental note to share some information my industrial vacuum pump sometime; my big pump is currently at the SnoCo Makerspace but it seems it gets used as hold-down weight on glue-ups more than it’s intended use but at least it’s getting some love.

I moved workshops; I swear this is related… The kids are at an age were it’s hard for me to get out to my workshop for very long and Melissa works in the evenings right now so I just wasn’t getting any fun-stuff done. I’ll shoot another workshop video… soon-ish. I’ve been slowly filtering through my bins of incomplete or never-started projects in and sorting through it all to bring some organization into my “inside workshop”. In digging through the bins I recently came across most of this eBay purchase: https://ebay.us/2L8SOa . If you want to skip on clicking the link it’s a small motor/vacuum pump with a suction cup grabber. I bought this for PopBot after the 2019 Robothon. I put this aside because I’ve been working on PopBot and a second marine-based robot platform for the last two months. PopBot is getting a deep drive because the SRS Robothon (2020) https://robothon.org/ has been cancelled this year. The thought is I might be able to grab the PopCan with a suction cup instead of actively grabbing it, or in my case I was going to sort hug it/lasso the pop can; time will tell on this. My initial concern is current draw, thankfully thing only pulls a couple hundred milliamps and then it’ll hold it’s suction fairly well for a while. I noticed a solid drop off in current after the suction was “successful”. I would have thought it opposite but I guess based on looking at current curves on squirrel cage fans and seeing them unload without air flow I’ll accept it without figuring out why. My goal is to grab the can with a pair of suction cups, drop the motor PWM or turn it off once the suction is maintained (as determined by current) and then just provide a couple moments of pumping to maintain suction while transporting the can. For testing I came up with a quick little circuit with a Pololu DC motor driver (#2961) and an Adafruit i2c IN219 current sensor breakout board… don’t mind all the other stuff strapped to the MEGA in the photo below. It was on my bench for some sensor fusion testing. The INA219 is hooked up to the i2c ports (20/21) on the MEGA2560 and the motor driver is getting a PWM drive from Pin 6. I didn’t need to use the enable or direction, I just sunk the enable low. The amount of suction is quite adequate if you’re a 14 year old boy trying to get popular by giving yourself a hickey…. this is not recommended of course and mostly a guess as I have 4-day-old vacation stubble so there is no sense in trying.

The code for testing is at the end of the post, anyone with a couple hours of experience with Arduino IDE could whip this out in 10 minutes but just in case you were hoping to save 9-1/2 minutes…

/*  @chasihler iradan.com/
 * 
 * 0.1 2020/08/20 Test
 * 
 * INA219 test w/ Vacuum Pump
 * Most of this is from the adafruit library example. 
 * 
 */


#include <Wire.h>
#include <Adafruit_INA219.h>

Adafruit_INA219 ina219;

int motor_pwm_pin = 6;
int motor_enable_pin = 7;

int int_stop = 0;
int int_lowSpeed = 950;
int int_highSpeed = 1023;

void setup() {
  Serial.begin(115200);
    
  pinMode(motor_pwm_pin, OUTPUT);
  pinMode(motor_enable_pin, OUTPUT);

    if (! ina219.begin()) {
      Serial.println("Failed to find INA219 chip");
        while (1) { delay(10); }
    }
      //ina219.setCalibration_32V_1A();
      //ina219.setCalibration_16V_400mA();
}

void loop()  {
  float shuntvoltage = 0;
  float busvoltage = 0;
  float current_mA = 0;
  float loadvoltage = 0;
  float power_mW = 0;
  Serial.println("No Load Test");
  Serial.print("Bus Voltage:   "); Serial.print(busvoltage); Serial.println(" V");
  Serial.print("Shunt Voltage: "); Serial.print(shuntvoltage); Serial.println(" mV");
  Serial.print("Load Voltage:  "); Serial.print(loadvoltage); Serial.println(" V");
  Serial.print("Current:       "); Serial.print(current_mA); Serial.println(" mA");
  Serial.print("Power:         "); Serial.print(power_mW); Serial.println(" mW");
  Serial.println("");
  
  analogWrite(motor_pwm_pin, int_lowSpeed);
  delay(1000);

  shuntvoltage = ina219.getShuntVoltage_mV();
  busvoltage = ina219.getBusVoltage_V();
  current_mA = ina219.getCurrent_mA();
  power_mW = ina219.getPower_mW();
  loadvoltage = busvoltage + (shuntvoltage / 1000);

  Serial.println("Low Speed Test");
  Serial.print("Bus Voltage:   "); Serial.print(busvoltage); Serial.println(" V");
  Serial.print("Shunt Voltage: "); Serial.print(shuntvoltage); Serial.println(" mV");
  Serial.print("Load Voltage:  "); Serial.print(loadvoltage); Serial.println(" V");
  Serial.print("Current:       "); Serial.print(current_mA); Serial.println(" mA");
  Serial.print("Power:         "); Serial.print(power_mW); Serial.println(" mW");
  Serial.println("");
    
  delay(1000);
  analogWrite(motor_pwm_pin, int_stop);  //stop
  delay(5000);
  analogWrite(motor_pwm_pin, int_highSpeed);
  delay(1000);

  shuntvoltage = ina219.getShuntVoltage_mV();
  busvoltage = ina219.getBusVoltage_V();
  current_mA = ina219.getCurrent_mA();
  power_mW = ina219.getPower_mW();
  loadvoltage = busvoltage + (shuntvoltage / 1000);
  
  Serial.println("Full Speed Test");
  Serial.print("Bus Voltage:   "); Serial.print(busvoltage); Serial.println(" V");
  Serial.print("Shunt Voltage: "); Serial.print(shuntvoltage); Serial.println(" mV");
  Serial.print("Load Voltage:  "); Serial.print(loadvoltage); Serial.println(" V");
  Serial.print("Current:       "); Serial.print(current_mA); Serial.println(" mA");
  Serial.print("Power:         "); Serial.print(power_mW); Serial.println(" mW");
  Serial.println(""); 
     
  delay(2000);
  analogWrite(motor_pwm_pin, int_stop);  //stop
  delay(10000);
}

Programming ESC with Arduino

The story: I hit a break wall with ODrive. ODrive is an open source brushless DC motor (BLDC) driver built with robotics in mind (my application..). I don’t have faith in the project and after months of trying to make it fit my application I’m abandoning it. It’s painful to spend that kind of money on a product (two even!) … but I’m not hopping back on the Stepper bandwagon just yet. I’ll see if I can put my brushless DC motors to use on PopBot 0.5.

First step was deciding on if I could use an off the shelf ESC or buy one. I purchased a RC “rockcrawler” driver as I assumed the firmware would be most compatible with my application. The car and boat ESCs have forward and reverse speed by splitting the PWM servo input in half. While waiting on shipping I found an ESC for a boat and a few for quads in one robot junk bins. Quads are single directions but the boat one was good enough for testing. It had no torque in the low end but that’s not a surprise based on the application with the motor type. I needed a way to program this ESC without a controller and receiver. Programming is typically performed w/ the receiver/controller by pushing the speed to min-max in a certain order. Well that can be done with the arduino of course. Here is a super simple piece of code for you if you don’t want to reinvent the wheel. This will also allow you to control your ESC once it’s programmed and you can uncomment my basic acceleration code if desired.

Hook up the ESC control signals (servo input). On the ESC the white (signal in, sometimes I think the alternate color is orange?) to digital output 9 on the Arduino Uno or Mega. Tie the black (or brown) wire to one of the grounds. DO NOT HOOK UP RED. We don’t need the power from the ESC.. it’s usually not something we want anyways (like 6V… ).

You’ll need this library. Download it and place the uncompressed directory in your Arduino libraries directory.

https://github.com/maxpowel/ESC

/*
 * Charles Ihler, iradan.com/
 * 2020-04-27 build from example of library. 
 * 
 * Open the serial monitor... enter 0 (and enter) for reverse
 * 1 for foward and 2 for idle/stop.. 
 * Most ESCs want a motor hooked up or warn of damage.. make sure the motor is safe and can't spin off and hurt something. 
 * 
 */

#include <Servo.h>
#include "ESC.h"


ESC esc(ESC::MODE_FORWARD_BACKWARD);


int sel = 0;
String ssel;

void setup() 
{
  Serial.begin(115200);  
  pinMode(LED_BUILTIN, OUTPUT);
  esc.attach(9); //change to some other PWM pin if required

} 

void output_high() {
   digitalWrite(LED_BUILTIN, HIGH);
   esc.setDirection(ESC::FORWARD);
   esc.setSpeed(500);   //comment this out and uncomment below for acceleration. When test running motor.
   //for (int i = 0; i <= 150; i++) {
   //   esc.setSpeed(i);
   //delay(25);
   //}
}
void output_low() {
  digitalWrite(LED_BUILTIN, LOW);
  esc.setDirection(ESC::BACKWARD);
  esc.setSpeed(500);   //comment this out and uncomment below for acceleration. When test running motor.
  //  for (int i = 0; i <= 150; i++) {
  //    esc.setSpeed(i);
  //  delay(25);
  //}
}
void output_n() {
  digitalWrite(LED_BUILTIN, LOW);
  esc.setDirection(ESC::BACKWARD);
  esc.setSpeed(0);
}
void loop() 
{
    Serial.print("Forward (1), Reverse (0), Stop/N(2)?(1/0/2): "); 
    while (Serial.available() == 0) {}  
    ssel = Serial.readString();  
    Serial.print(" --> ");
    Serial.println(ssel);
    sel = ssel.toInt();
    if (sel == 1) {
      output_high();
      Serial.println("ON!");
    }
    if (sel == 0) {
      output_low();
      Serial.println("OFF.");
    }
    if (sel == 2) {
      output_n();
      Serial.println("Neutral");
    }
  delay(100);

} 
The setup project with motor removed.

Enjoy…